To be honest, craft is the last thing I was in the mood for this weekend. After some tragic news on Saturday morning, the tone of what was planned to be a fun 3 day weekend, soon turned into a very sombre one indeed. All I really wanted to do was hug my pillow and cry. But my children don’t really understand grief, so after 24 hours of my moping around, they were climbing the walls. I was inspired by this project from an activity I saw at school a few weeks ago, of individual owls as they related to the letter O (letter of the week). I thought a little owl family with the kids prints would look very cute.
The concept is quite simple like most of my projects, and as you can see in the photos below, so I wont go into too much detail. I let the kids choose from my scrapbooking paper a pattern they liked, but you could just as easily use plain colours. The background is just 2 school scrap books centre pages sticky taped together, then washed with blue water colour as demonstrated by Mr 8. Once dry, I ironed the paper to make it flat again. I drew the owl body and Mr 8 and I cut them out. The eyes were traced from a circular cookie cutter and cut out. The black dots made with a hole punch. I just drew one foot, then used it as a stencil for the rest of the feet, so they are all similar.
The kids then chose their wing colour. I placed the body on the background and had the children do their hand prints one at a time, starting in the middle. This way I didn’t have to worry too much about working out the spacing. Once they were all done, I sketched in a branch and Mr 8 painted it in. Then it was just a case of glueing eyes, pupils, beaks and feet. We added some leaves cut out from green paper to the branch and there you have it. A little owl family hand print keepsake.

Mr 8 painting the sky.

The sky backdrop.

Use one foot as a stencil for the rest of the feet.

Choosing the paper.

Glue owl body.

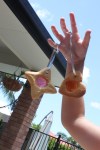
Paint hands.

Mr 8 placing the first print.

Mr 2’s hand prints

Mr 8 painting the branch

Glueing on the feet

Glueing on the feet

Cutting out the leaves

Adding the leaves.

Girly owl.

Baby owl and big brother owl

Girl and Boy owl.

Owl hand print family.

Owl family wall hanging.

Close up.

From a distance.
Materials:
Paper, Scissors, hole punch, water colour, coloured card and paper, glue stick, craft paint.
If you have got this far, thank you for reading, I hope you enjoyed the post and it inspires you to do something just as fun and rewarding with your young family. But if I can just ask one small thing of you, next time the opportunity arises, please donate to childhood cancer research in your country. Currently only 5% of research funds go towards childhood cancer research, so please pinpoint your donations to this very important cause. This beast needs to be stopped.