Tag Archives: paint

Egg Carton Daffodils – School Holidays Craft

Standard

School holidays!  Woot! First cab off the rank, these simple little daffodils made from egg cartons.

IMG_5949


All you need is an egg carton, paint, pipe cleaners or skewers, glue.  I used split pins to attach the centres to the petals, but you could just glue them too.  One carton makes 5 flowers.

IMG_5926


Cut the centres first, as shown above.  Then cut out 5 of the cups to make neat little flowers.  Daffodils technically have more than 4 petals, but I just worked with 4  as the egg cups have a squarish shape and it was easier to cut that way.

Paint the middle sections inside and out.  We used orange, but you could use any colour you like.  Then paint the outers a lighter colour.

Once dry, I poked some holes through the centre of each piece and using pliers inserted a gold split pin (my fingers wouldn’t fit in there, so had to use pliers).

For the stems, pipe cleaners would have been easier, but I decided to use some skewers wrapped in green raffia.  It gave them a more natural texture.  I secured the raffia at each end with some sticky tape.

Then it was simply a case of attaching the stems to the flowers.  I used hot glue for this.


Make Your Own Bottle Top Stamps

Standard

Here’s a super quick and easy activity to put together to keep your toddlers and preschoolers entertained.  All you need is some bottle caps and foam stickers (available from most $2 shops and craft stores). If you don’t have a stamp pad, you can spread out a thin layer of paint on a plate or add a few drops of water to a water colour tray like we have.  

bottletopstampPreview


This slideshow requires JavaScript.

Kids Valentine Craft, Love Heart Entrance – Bubble Painting.

Standard
Kids Valentine Craft, Love Heart Entrance – Bubble Painting.

We have done a bubble painting project before for Easter, it is so easy and the results are always cool, so we have tried it again this time just using pink.  We also used some pink paper as well as the white, where as last time we just used white paper.

Valentine Door Hanging,

Valentine Door Hanging,


Again I cheated and printed out some heart shapes, rather than drawing them all just so all the sizes were consistent.  You could obviously trace around a cookie cutter too, but hey, did I mention I am lazy?  I didn’t really measure out the ingredients for the bubble paint, it really was a squeeze of dishwashing liquid, splash of food colouring and a splash of tap water.  Then let the kids blow bubbles in the mixture until the bubbles come up over the top of the bowl.  Get them to quickly place the paper gently over the bubbles and the patterns will transfer to the paper. Instead of cutting each shape out first this time, we did the painting then cut them out after they were dry.  Then it was just a case of attaching them to some gift ribbon with tape.  I stuck them to the wall with blue tac.

doorhearts

If you wanted to make these hang in a door way, it would be a good idea to paint both sides of the paper, so they can spin and still look pretty on both sides.

Valentine Craft, Love Heart Door Hanger.

Standard
Valentine Craft, Love Heart Door Hanger.

We made 2 different variations of valentine door hangers, but both styles use the same materials.  The hearts are made from salt dough, the same as those DIY Christmas ornaments you see all over Pinterest. There is plenty of recipes and methods available online.  The bows are a basic bow that again you’d see on Pinterest.  There is hundreds of bow tutorials all over the internet too, but I kind of made it up as I was going along.  

IMG_4398

We used the following recipe

  • 1 1/2 cups plain flour
  • 1/2 cup fine table salt
  • 1 tablespoon vegetable oil
  • 2/3 cup chilled water

Mix all ingredients as you would biscuits, using some extra flour as necessary along the way to stop it sticking.  Roll out 7mm thick, cut into shapes then bake at 120C for 2.5 to 3 hrs.  Once cooled, we painted them with craft acrylic paint.

The top bow feature for this one was made by cutting 4 equal lengths of ribbon, putting a small line of hot glue in the centre of one at a time, folding each end into the middle to create a single bow shape.  Then doing the same with the next ribbon, pilling them up as I went.  You can see this in the photos.  Finished off with a button.

Then it was just a case of threading the hearts, adding some extra ribbons and glueing all together at the back.

doorhanger

Turn Recycled Cans into Cute Garden Ornament

Standard
Turn Recycled Cans into Cute Garden Ornament

This little piggy went to market…  And this little piggy just wants to play in the garden!  How cute is this? Made from recycled cans and a tin bucket, some pink paint, wire and a few screws!

OLYMPUS DIGITAL CAMERA

The assembly process was very similar to the Tin Can Men from a few days ago. You can see how they did it in the pictures below. I want one!

OLYMPUS DIGITAL CAMERA


This clever school holiday project is bought to you by All Tizzied Up.  If you are in Australia and in need of some bows, check out their page.

Autumn Tree, Family Craft Activity

Standard
Autumn Tree, Family Craft Activity

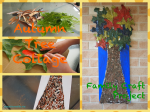
This week I am excited to feature a project from a local crafty mumma from All Tizzied Up .  She and her gorgeous girls have brought nature and some textiles together to create a colourful fall themed wall hanging.  

OLYMPUS DIGITAL CAMERA


They have gathered up some bark and leaves and painted the leaves while still fresh using acrylic craft paint.  The paint has slowed down the drying out process and kept them supple so they don’t crack through the next few steps.  The rest if fairly self explanatory, or run your mouse over each picture for more details.

Once all the collage was together, mum then filled in the surrounds of the tree with blue paint and there you have it.

autumntree