Tag Archives: preschool

Egg Carton Daffodils – School Holidays Craft

Standard

School holidays!  Woot! First cab off the rank, these simple little daffodils made from egg cartons.

IMG_5949


All you need is an egg carton, paint, pipe cleaners or skewers, glue.  I used split pins to attach the centres to the petals, but you could just glue them too.  One carton makes 5 flowers.

IMG_5926


Cut the centres first, as shown above.  Then cut out 5 of the cups to make neat little flowers.  Daffodils technically have more than 4 petals, but I just worked with 4  as the egg cups have a squarish shape and it was easier to cut that way.

Paint the middle sections inside and out.  We used orange, but you could use any colour you like.  Then paint the outers a lighter colour.

Once dry, I poked some holes through the centre of each piece and using pliers inserted a gold split pin (my fingers wouldn’t fit in there, so had to use pliers).

For the stems, pipe cleaners would have been easier, but I decided to use some skewers wrapped in green raffia.  It gave them a more natural texture.  I secured the raffia at each end with some sticky tape.

Then it was simply a case of attaching the stems to the flowers.  I used hot glue for this.


Easter Biscuits – Kids in the Kitchen.

Standard
Easter Biscuits – Kids in the Kitchen.

Much to my children’s disappointment, I am not much of a sweet tooth.  So I struggle to be inspired to make sweet treats.  But I figured we should do some ‘cooking’ for Easter, and this seemed simple enough for my likings.  🙂

They kids had lots of fun making mess with the icing and creating patterns on the Arrowroot biscuits.   I just bought ready made icing – because yes, I am that lazy.  🙂  Mini M&Ms and snakes for the stripes.


Easterbisuits2.jpg

Kids Craft, Easter Egg Sun Catcher / Stained Glass

Standard
Kids Craft, Easter Egg Sun Catcher / Stained Glass

Inspiration for this project came from Alpha Moms blog. I thought I’d adjust it into an Easter themed project, given it is already that time of year.

All you need is some of the whitish milk or juice cartons.  We actually used a cordial bottle for the grass.  The stickers on the milk bottle where quite hard to remove and left a sticky residue.  I managed to remove this with some mineral turpentine.

Once you have your clean pieces of plastic, draw or as we did, trace your shapes using a black permanent marker (Sharpie etc).  Then let the kids colour as desired.  Once coloured, cut away the extra plastic and you’re done!  They turned out even better than expected.

20140406-170035.jpg


We attached ours to the windows using double sided tape rather than suction cups.


Make Your Own Bottle Top Stamps

Standard

Here’s a super quick and easy activity to put together to keep your toddlers and preschoolers entertained.  All you need is some bottle caps and foam stickers (available from most $2 shops and craft stores). If you don’t have a stamp pad, you can spread out a thin layer of paint on a plate or add a few drops of water to a water colour tray like we have.  

bottletopstampPreview


This slideshow requires JavaScript.

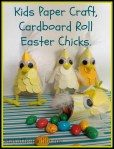
Cardboard Roll Easter Chicks – Kids Easter Craft.

Standard
Cardboard Roll Easter Chicks – Kids Easter Craft.

I’d like to say I came up with this all on my own, but that would be a lie.  Ms5 and I made some owls inspired by this post from   Kerrys Craft Blog.  It was from this concept that I came up with these easter Chicks.  I thought the fact you can hold eggs or treats in them was ideal for an easter craft project.

IMG_4814


All you need is some coloured paper, cardboard rolls, tape and glue.  You can make them just as cute without the feathers, goggly eyes and pipe cleaners, but if you have some of those handy, you could use them like we did too.   The main difference between these and the owls is that the top and bottom folds are in opposite directions to each other, so the head comes to a peak in the middle rather than making two ears like the owls have.  The rest of the instructions can be found by running your curser over or clicking on the photos below.


easterchicks

Bugs and Bees and Butterflies! So Sweet!

Standard
Bugs and Bees and Butterflies! So Sweet!

Check out these cute bugs the girls at All Tizzied Up put together on the weekend.  Made from pipe cleaners, pom poms, wooden pegs, goggly eyes and tulle.  So simple and so cute!

OLYMPUS DIGITAL CAMERA


They have kindly taken step by step photos so you can be inspired too, to create your own colouring creepy crawlies.

OLYMPUS DIGITAL CAMERA

Soup Mix Scale Creatures, Sensory Craft

Standard
Soup Mix Scale Creatures, Sensory Craft

I actually stole this idea from Mr3s current favourite show, Mister Maker.  We used soup mix, but you could use lots of different things, dry lentils, rice, couscous, anything that is going to give you a unique texture and that is fun to run through your hands.

IMG_4624

I just printed out some basic shapes from the internet.  Keep them simple as you’re going to cover up any detail anyway.  Smear the area with some craft glue and attach an goggly eye. Then let the kids sprinkle the mix over the rest of the glue area to completely cover it.  Gently shake off any excess into the bin.  These took about 24 hours to dry.  Once fully dry, cut out.  We created a simple background with some coloured paper and put them in $2 Ikea frames.


soupmix2

Kids Valentine Craft, Love Heart Entrance – Bubble Painting.

Standard
Kids Valentine Craft, Love Heart Entrance – Bubble Painting.

We have done a bubble painting project before for Easter, it is so easy and the results are always cool, so we have tried it again this time just using pink.  We also used some pink paper as well as the white, where as last time we just used white paper.

Valentine Door Hanging,

Valentine Door Hanging,


Again I cheated and printed out some heart shapes, rather than drawing them all just so all the sizes were consistent.  You could obviously trace around a cookie cutter too, but hey, did I mention I am lazy?  I didn’t really measure out the ingredients for the bubble paint, it really was a squeeze of dishwashing liquid, splash of food colouring and a splash of tap water.  Then let the kids blow bubbles in the mixture until the bubbles come up over the top of the bowl.  Get them to quickly place the paper gently over the bubbles and the patterns will transfer to the paper. Instead of cutting each shape out first this time, we did the painting then cut them out after they were dry.  Then it was just a case of attaching them to some gift ribbon with tape.  I stuck them to the wall with blue tac.

doorhearts

If you wanted to make these hang in a door way, it would be a good idea to paint both sides of the paper, so they can spin and still look pretty on both sides.

Valentine Craft, Love Heart Door Hanger Part 2

Standard
Valentine Craft, Love Heart Door Hanger Part 2

This is another variation of our earlier Valentine Door Hanger , the main difference is rather than hanging the hearts from strings, we hot glued them to a flat ribbon.  The finer details can be found in the previous post or by hovering over the images below.

valentine3


Method and recipe for making the hearts can be found on the previous blog entry.

Tin Can Garden Men! School Holiday Project

Standard
Tin Can Garden Men! School Holiday Project

I must say I am quite jealous of all the projects the girls at All Tizzie Up are doing this holidays.  I have been so swamped with work and other obligations I just haven’t had the time or energy to get any of the things I wanted to done. But that will change!  In the meantime, I am very happy they are helping keep my blog active!  Here is some cute little tin can men they made using recycled cans, wire, paint, beads and some bells.


OLYMPUS DIGITAL CAMERA

Watch the slide show or click on the images for step by step instructions to make your own recycled can garden critters.


This slideshow requires JavaScript.

OLYMPUS DIGITAL CAMERA

DIY Christmas Bell Mobile

Standard
DIY Christmas Bell Mobile

If you like working with fabric like my friends at All Tizzied Up , here’s a simple Christmas craft decoration you can put together with the kids that will last for years to come.


fuffybells1


Once you have gathered the fabric you want to use, all you need is some styrofoam bells, ribbon, hot glue and sharp scissors and you’re ready to get crafty.  The smaller kids can get working on the covering the loop while an adult does the hot glue bits.  The rest of the steps are covered in the photos below.


3 Easy Mini Christmas Tree Decorations

Standard
3 Easy Mini Christmas Tree Decorations


My crafty mum friend at All Tizzied Up has been very busy putting together some Christmas Craft projects with the family.  Thought we’d share for inspiration.


OLYMPUS DIGITAL CAMERA


They created 3 different trees from styrofoam cone shapes using buttons, ribbon, felt, and every crafters favourite tool – a hot glue gun!


The felt tree was created by layering leaf shape felt pieces working from the bottom up, then decorating with plastic jewels.


This one is simply a case of measuring out same lengths or ribbon, fixing with hot glue, then twisting, gluing again.  Glue 2 of these together to create a flower type shape and attach to the cone.  Again, finishing with some jewels to look like ornaments.

The button one is covered in aluminium foil, before attaching buttons all over with hot glue.

So if you are wondering what to do this weekend before Christmas, maybe get out the craft supplies and get crafty with the kids.  Would make a great addition and talking point for your Christmas table on Wednesday!


Easy Kids Craft – Hanging Christmas Decoration

Standard

These are really simple to make and kids of all ages can help.  Mr8 actually showed me how to make one, then we extended on the concept to create this hanging ornament.

3dstars

It is really just 2 card board stars slotted into each other at right angles to create a ‘3D star’ as he calls them.  But we made 4 different sized and hung them form some cotton.  We covered each star with some paper from a themed wrapping pack, so they were not all exactly the same, but similar enough to ‘match’.  The whole project took about 20 minutes for 3 of us and looks pretty cool!  Further instructions available if you open or scroll over each picture.

Paper Plate Angel Garland – Christmas Craft

Standard
Paper Plate Angel Garland – Christmas Craft

These are very easy to make and can be as fancy or as simple as you like.

paperplate

I usually avoid glitter when doing craft.  Sure it’s pretty, but after we use it, that stuff turns up all over the place for the next month.  ‘The herpies of the craft world’ a friend of mine called it, I think she was right.  But today I caved, because an angel needs her sparkle! Honestly, there was no template, just trial and error until I got the shape I was after.  You can see the steps in the photos below.  Double sided plates for the body would have made pretty dresses, but I couldn’t find any of those, so we stuck with white.  Of course you could get the kids to colour them or even use a different colour glitter on the body too. But I was all glittered out after the wings alone!


Autumn Tree, Family Craft Activity

Standard
Autumn Tree, Family Craft Activity

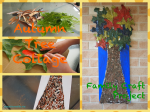
This week I am excited to feature a project from a local crafty mumma from All Tizzied Up .  She and her gorgeous girls have brought nature and some textiles together to create a colourful fall themed wall hanging.  

OLYMPUS DIGITAL CAMERA


They have gathered up some bark and leaves and painted the leaves while still fresh using acrylic craft paint.  The paint has slowed down the drying out process and kept them supple so they don’t crack through the next few steps.  The rest if fairly self explanatory, or run your mouse over each picture for more details.

Once all the collage was together, mum then filled in the surrounds of the tree with blue paint and there you have it.

autumntree

Halloween Toddler Craft, DIY Treat Boxes

Standard
Halloween Toddler Craft, DIY Treat Boxes

I know many Australians still have not accepted Halloween, ‘it’s a silly American tradition’, even though it is not American, but anyway, they really should, because it is heaps of harmless fun and the kids love it.  Our new neighbourhood really gets into it, I think I enjoy it more than Christmas!

But of course, it’s not just about the dressing up and lollies, halloween craft is lots of fun too. Maybe it’s because I am new to it, but it seems so much more fun than Easter and Christmas craft.  Today I just did a simple project with the little kids as the older 2 were not home.  I had another idea in my head, but have decided to keep that for later in the school holidays.  I am hoping to get quite a few Halloween themed projects in over the next 2 weeks while the kids are off.

I cut out some Halloween shapes in the potatoes while Ms4 gathered the paint and plastic plates.  The boxes were just from the grocery store, but they are available at many places, $2 shops etc. We had to allow each side to dry before doing the other side, as you need to apply pressure for best results, rather than trying to stamp the assembled boxes.  Once both sides were dry we applied another coat of glitter paint, and some embellishments, again, one side at a time.  The weather was nice today so the whole project only took a couple of hours even while waiting for things to dry.


I am pretty happy with the results.  Would have liked some different coloured boxes for variety, and was disappointed we are out of black paint for the bats, but over all, not bad for an afternoons work.


Halloween1

Ten Tin Bowling! Recycled Cans – Toddler Activity.

Standard
Ten Tin Bowling! Recycled Cans – Toddler Activity.


The hardest part of this project was collecting the cans!  To make stacking easier, make sure all 10 cans are the same height.  Obviously you don’t need to cover the cans with paper, but I think it made it a bit more fun.   I just cut some scrap booking paper to size, fixed with tape, and they’re done.


This activity develops hand eye coordination, cognitive and gross motor skills.  Once you’ve had enough, the cans can just go into the recycling!   The kids loved the noise they make as they smashed to the ground.  Older kids could keep score and make a more competitive game out of it.


tentinbowling

Owl Family Craft Project

Standard
Owl Family Craft Project

To be honest, craft is the last thing I was in the mood for this weekend. After some tragic news on Saturday morning, the tone of what was planned to be a fun 3 day weekend, soon turned into a very sombre one indeed.  All I really wanted to do was hug my pillow and cry.  But my children don’t really understand grief, so after 24 hours of my moping around, they were climbing the walls.  I was inspired by this project from an activity I saw at school a few weeks ago, of individual owls as they related to the letter O (letter of the week).  I thought a little owl family with the kids prints would look very cute.

The concept is quite simple like most of my projects, and as you can see in the photos below, so I wont go into too much detail.  I let the kids choose from my scrapbooking paper a pattern they liked, but you could just as easily use plain colours.  The background is just 2 school scrap books centre pages sticky taped together, then washed with blue water colour as demonstrated by Mr 8.  Once dry, I ironed the paper to make it flat again.  I drew the owl body and Mr 8 and I cut them out.  The eyes were traced from a circular cookie cutter and cut out.  The black dots made with a hole punch.  I just drew one foot, then used it as a stencil for the rest of the feet, so they are all similar.

The kids then chose their wing colour.  I placed the body on the background and had the children do their hand prints one at a time, starting in the middle.  This way I didn’t have to worry too much about working out the spacing. Once they were all done, I sketched in a branch and Mr 8 painted it in. Then it was just a case of glueing eyes, pupils, beaks and feet.  We added some leaves cut out from green paper to the branch and there you have it.  A little owl family hand print keepsake.

Materials:

Paper, Scissors, hole punch, water colour, coloured card and paper, glue stick, craft paint.

If you have got this far, thank you for reading, I hope you enjoyed the post and it inspires you to do something just as fun and rewarding with your young family.  But if I can just ask one small thing of you, next time the opportunity arises, please donate to childhood cancer research in your country.  Currently only 5% of research funds go towards childhood cancer research, so please pinpoint your donations to this very important cause. This beast needs to be stopped.

Home Made Chalk with an Easter Twist.

Standard
Home Made Chalk with an Easter Twist.

I have been going to try out this home made chalk method for a while.  When I picked up some new silicone moulds from Aldi last week, I figured it was the perfect opportunity to try them both out!

Ingredients and utensils.

Ingredients and utensils.

Ideally disposable plastic cups would be the best thing to mix the plaster in, but I didn’t have any, so we just used some plastic cups we are not very attached to (IE, not Tupperware, lol).  You can buy plaster of paris from any large hardware or craft shop for around $10 for a 3kg (which is heeeaaaaps, 1kg is more than enough for this project). Silicone or rubber ice cube trays, food colouring and something to stir with.  Again, paddle pop sticks would have been better, but these skewers will do the trick.


Mix the food colouring in the water first, then add the plaster.  Stir rapidly until its fully mixed, then poor into the moulds. The plaster will set in roughly half an hour, some water may rise to the top, you can just dab this away with some paper towel or tip the moulds after this time for it to run away.  Then allow to fully cure in the moulds over night.  We also experimented with some glitter in the chalk, for something a bit different.  It actually worked quite well, although its really hard to capture the results with the camera.


Then simply turn out of the moulds and get drawing!

IMG_6633


This slideshow requires JavaScript.


Decorated Eggs, Easter Egg Dying and Decorating.

Standard
Decorated Eggs, Easter Egg Dying and Decorating.

While we did the Tie Dying, I also started experimenting with a few other methods of colouring eggs using a home made dye using ingredients that almost everyone has already in their kitchen.  These were some of the results;

IMG_6530

These are obviously pretty straight forward.  Dyed in a food colouring/vinegar/warm water mixture.  Then a scrap booking embelishment stuck on.  Would have preferred embellishments without the clear plastic behind them, but the craft shop didn’t have any like that and you can’t really tell from a distance anyway.

IMG_6521

I love how these turned out.  Just use leaves from the garden, lay over the eggs then cover with a stocking or pantyhose.  I actually used some stocking I had on hand and didn’t even need to ruin them in the process.  Dip dye for a few minutes and you’re done.

Crepe paper results

Crepe paper results


We actually discovered this dying method accidentally.  After we had finished the Tie Dying from a previous post, we placed the eggs on this pre shredded crepe paper.   Some of the eggs still had a bit of water in them from the boiling process, so when that ran out and wet the paper, the colour transferred onto the eggs!  So I took it a step further, wet a hand full and covered them in it.  The results are pretty cool I think!

The dying solution we used was 3 parts hot tap water to one part vinegar, with as much food colouring as you wanted, we only used about a teaspoon per large cup.

Some of the other patterns we created can be seen below.