Category Archives: School Holiday Entertainment

Mt Coot-tha Botanic Gardens.

Standard
Mt Coot-tha Botanic Gardens.

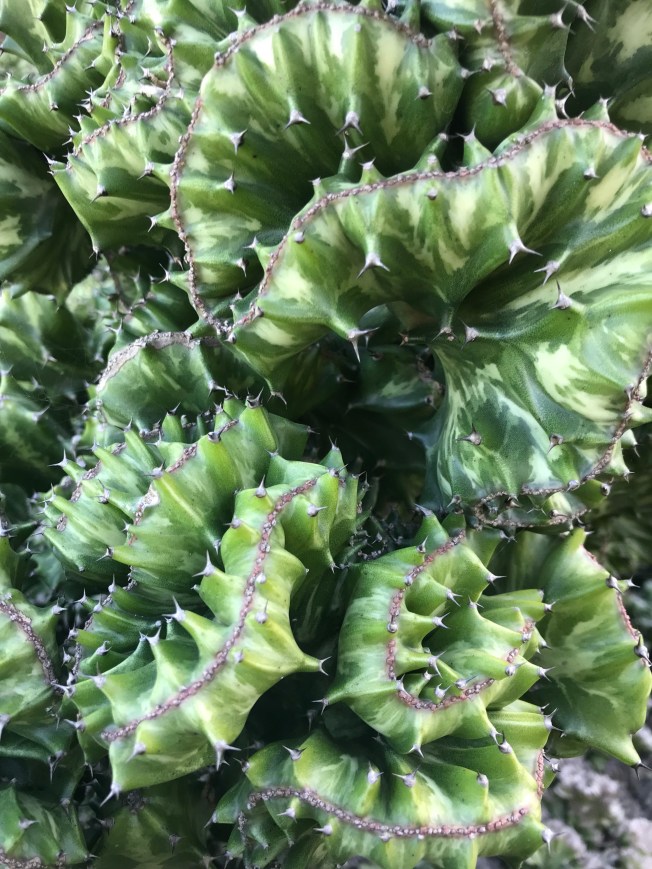
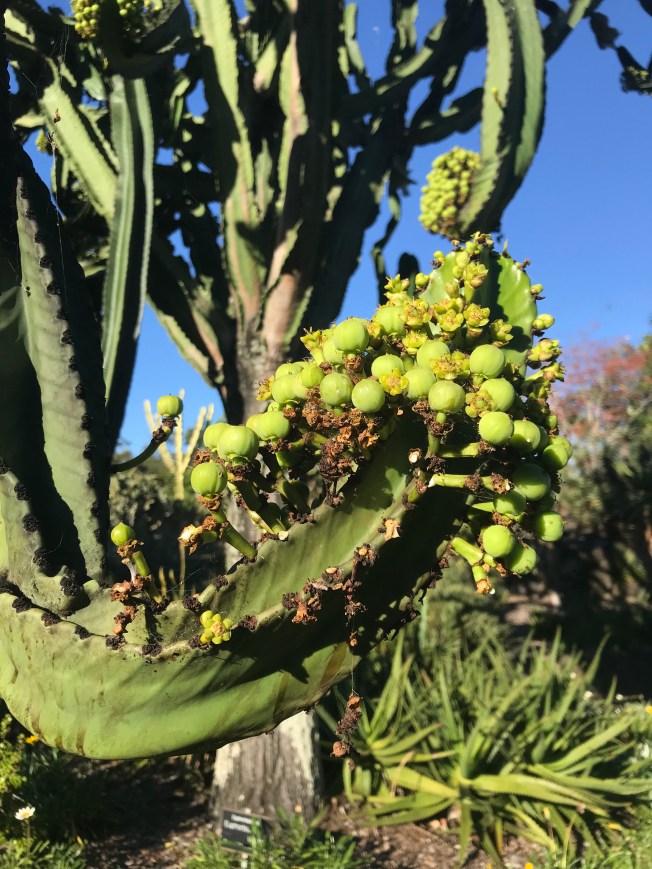
I don’t know why, but I always seem to find myself at these gardens in autumn or winter. Annoying really as I would love to see them in full spring bloom.  None the less, the gardens have a pretty impressive display of succulents, cacti and other odd specimens that are impressive all year round.

CactusfTScg+Y8RverNvTmIdyXhwAp+Na964Qu+6JTf6kxiHcAJ+zbL77PSJW21rIUC4yMEgfullsizeoutput_19b6rPvj0Oy9SiaaLOKDDqs3FA1eCTqNeCT6SEEwve8K65eAb%JNLpbERgCdEXeF6mSpXAhdEo9ME9RXu3vWTNtvdzRgfullsizeoutput_19b8

So if you are wanting to get out of the house for a few hours, pack up the picnic blanket and head down to the Mount Coot-tha Botanical gardens. Open 8am to 5pm daily, with an onsite cafe to grab a bite to eat if you don’t feel like packing your own lunch.

A duck walked up to a lemonade stand…

Standard

and he said to the man, running the stand ‘hey, have you got any grapes?’

Not sure if it was inspired by this or too many episodes of The Simpsons, but Mr 9 wanted to start a lemonade stand.  Only a few problems with this; we don’t have a supply of lemons, we don’t know how to make lemonade and we don’t have enough foot traffic outside our house to make it worth our while… But I didn’t want to quash his ambition altogether.  So what can a small boy do to make some money? The answer was staring me down – literally.  Breed fish.

I grew up with aquariums, my father also a fish hobbyist. There’s never been a time in my life that I have not had at least one tank (if not several) running. My kids already have many of the basic fish keeping skills having always had tanks around them too, so this seems like a good hobby to get them into.  We are just sticking with live bearers at this stage, as they are the easiest as far as I am concerned.  If they stay enthusiastic we can move on to more complicated fish later.

While it may not be a proper business for him as such, as I wont make him responsible for over head costs (food, electricity etc) the project offers lots more.  Its about life, death, birth, cleaning and maintaining something, responsibility and science, with water testing, how temperature is relevant to breeding etc.  So while they might only make a few dollars from it, the over all life experience will be much more beneficial, and they’ll have no idea they’re even learning. 🙂

This is only the 3rd week of monitoring and taking extra special care of the fish to promote breeding and we already have over 30 babies.  Now to keep them alive until they are fully grown!

Egg Carton Daffodils – School Holidays Craft

Standard

School holidays!  Woot! First cab off the rank, these simple little daffodils made from egg cartons.

IMG_5949


All you need is an egg carton, paint, pipe cleaners or skewers, glue.  I used split pins to attach the centres to the petals, but you could just glue them too.  One carton makes 5 flowers.

IMG_5926


Cut the centres first, as shown above.  Then cut out 5 of the cups to make neat little flowers.  Daffodils technically have more than 4 petals, but I just worked with 4  as the egg cups have a squarish shape and it was easier to cut that way.

Paint the middle sections inside and out.  We used orange, but you could use any colour you like.  Then paint the outers a lighter colour.

Once dry, I poked some holes through the centre of each piece and using pliers inserted a gold split pin (my fingers wouldn’t fit in there, so had to use pliers).

For the stems, pipe cleaners would have been easier, but I decided to use some skewers wrapped in green raffia.  It gave them a more natural texture.  I secured the raffia at each end with some sticky tape.

Then it was simply a case of attaching the stems to the flowers.  I used hot glue for this.


Wax and Water Colour Painting.

Standard

The motivation and creativity has been lacking majorly around here lately due to a heavy work load, but I set myself a challenge to blog at least once a month when I started this. So as June rapidly drawers to an end, here it is!  Most people probably remember doing this at school, magic painting, hidden pictures, secret messages, all the same thing under different names.
IMG_5657


All you need is some plain white candles, paper and water colour paints. We used the really cheap kids water pallet ones.  Rather than just doing some random paintings or drawings, I figured we’d turn them into something at the end.  So we printed out some sea animal colouring pages, stuck them to card and got decorating.

IMG_5650


You really can’t see where you have been with the wax, but I encourage the kids to try to create patterns or shapes as best they could.  Once they were finished with the candles, they went over each shape with some water colour paint.  As you wash over the whole picture, the paint will not attach to the areas covered in wax, leaving you with an interesting effect.

IMG_5656


Once dry, I cut out the shapes.  Ms5 helped put holes in them with the punch and we strung them up on a mobile frame with some streamers to make an under water mobile.

In hind sight we should have painted both sides of the shapes, but Ms5 is more than happy with it.  She’s trying to convince me to put a screw in the ceiling near the fish tank so we can hang it there.  lol.

IMG_5924

DIY Hidden Object Game

Standard
DIY Hidden Object Game

I saw one of these in a game shop last Christmas, I thought it was very cool but not “I’m happy to spend $40 on this” cool.  It just looked far too easy to make myself.  Turns out I was right. You could make these in any shape or size, and fill them with just about anything.  We had all these things in the house already, so it was fairly inexpensive.


rice.2.jpg


There is several methods for colouring rice on the net, but I was looking for quick and simple.  The blue and red we made with just food colouring and a dash of water, mixed well then laid flat to dry.  The yellow we used vinegar in place of the water (some recipes asked for rubbing alcohol but we don’t have any of that).  The yellow dried about 3 times faster than the other 2, so that is the way to go.  Instead of placing the trays in the sun, I just put them in the oven at 50C with the door open.  The red took about an hour to fully dry (it took the longest).  I did stir it around occasionally to prevent any sticking and distribute the wetter rice.

Mixing the colour and spreading out to dry.

While that way drying we hunted around the house for appropriate goodies to put inside.  We came up with 20 items.  The amount of items you want to use will depend on your container size.  I think we could have easily used twice as many, but it was still a good ratio.  The items varied in weight and texture.

It would have been easier to mix all the rice colours together prior to filling the container, but the kids enjoyed layering the different colours with a few objects between, then shaking to mix at the end.

The container we used was an old straw holder. You can buy them full of straws at the grocery store for around $4.  It did have a hole in the top, but this actually came in handy as a place to insert a ribbon and attach the key to what is inside.

I took a photo of all 20 items, shrunk it, then printed and covered in clear contact.  Attached to the ribbon on top.  If you were to just use a clear water bottle or similar, you could just tie something to the neck of the bottle.

The key

The key

Once everything was put in and we were happy with the level of rice, I taped it up nice and tight.  And that’s it.  Some of the lighter items are easy to find and often pop up to the top, but theres several things we have not managed to find again, like the smily badge and dinosaur!

The kids really enjoyed this project and were able to be involved every step of the way.  It was a bit messy, but over all a success.

Easter Biscuits – Kids in the Kitchen.

Standard
Easter Biscuits – Kids in the Kitchen.

Much to my children’s disappointment, I am not much of a sweet tooth.  So I struggle to be inspired to make sweet treats.  But I figured we should do some ‘cooking’ for Easter, and this seemed simple enough for my likings.  🙂

They kids had lots of fun making mess with the icing and creating patterns on the Arrowroot biscuits.   I just bought ready made icing – because yes, I am that lazy.  🙂  Mini M&Ms and snakes for the stripes.


Easterbisuits2.jpg

Make Your Own Bottle Top Stamps

Standard

Here’s a super quick and easy activity to put together to keep your toddlers and preschoolers entertained.  All you need is some bottle caps and foam stickers (available from most $2 shops and craft stores). If you don’t have a stamp pad, you can spread out a thin layer of paint on a plate or add a few drops of water to a water colour tray like we have.  

bottletopstampPreview


This slideshow requires JavaScript.

Looming Up A Storm – Our Rainbow Loom Gallery

Standard

If you have kids over the age of about 4 and you have not yet discovered Rainbow Loom, I highly recommend getting yourself… I mean THEM some.  Even the boys in my house get into it.  I won’t bother doing any tutorials because there is thousands out there already, check out youtube for videos on just about anything you can think of.  We just make bracelets mainly, but you can make charms, pencil grips, animals, flowers, heaps of different things.

Loom2


It will keep the kids entertained for hours.  You can pick up small bags of bands from cheap shops, or bags of 600 bands from spotlight or ebay for around $5.  Each bracelet requires 80 to 100 bands, so while 600 might sound like a lot, you’ll go through them quickly once you get addicted!

Here is a few of our creations.


Bugs and Bees and Butterflies! So Sweet!

Standard
Bugs and Bees and Butterflies! So Sweet!

Check out these cute bugs the girls at All Tizzied Up put together on the weekend.  Made from pipe cleaners, pom poms, wooden pegs, goggly eyes and tulle.  So simple and so cute!

OLYMPUS DIGITAL CAMERA


They have kindly taken step by step photos so you can be inspired too, to create your own colouring creepy crawlies.

OLYMPUS DIGITAL CAMERA

Ribbon Roses, Valentine Craft

Standard
Ribbon Roses, Valentine Craft

All Tizzied Up has taught her daughters how to make these ribbon flowers just as she did when she was a kid.  Very cute and pretty easy once you get the hang of it.


OLYMPUS DIGITAL CAMERA


All you need is some ribbon (thickness will determine how big the flower head ends up being), some felt if you would like to add leaves, styrofoam ball, wooden skewer and some pipe cleaners for the stem.  Step by step photos and instructions can be found by running over or clicking on the picture gallery below.


OLYMPUS DIGITAL CAMERA


Valentine Craft, Love Heart Door Hanger Part 2

Standard
Valentine Craft, Love Heart Door Hanger Part 2

This is another variation of our earlier Valentine Door Hanger , the main difference is rather than hanging the hearts from strings, we hot glued them to a flat ribbon.  The finer details can be found in the previous post or by hovering over the images below.

valentine3


Method and recipe for making the hearts can be found on the previous blog entry.

Valentine Craft, Love Heart Door Hanger.

Standard
Valentine Craft, Love Heart Door Hanger.

We made 2 different variations of valentine door hangers, but both styles use the same materials.  The hearts are made from salt dough, the same as those DIY Christmas ornaments you see all over Pinterest. There is plenty of recipes and methods available online.  The bows are a basic bow that again you’d see on Pinterest.  There is hundreds of bow tutorials all over the internet too, but I kind of made it up as I was going along.  

IMG_4398

We used the following recipe

  • 1 1/2 cups plain flour
  • 1/2 cup fine table salt
  • 1 tablespoon vegetable oil
  • 2/3 cup chilled water

Mix all ingredients as you would biscuits, using some extra flour as necessary along the way to stop it sticking.  Roll out 7mm thick, cut into shapes then bake at 120C for 2.5 to 3 hrs.  Once cooled, we painted them with craft acrylic paint.

The top bow feature for this one was made by cutting 4 equal lengths of ribbon, putting a small line of hot glue in the centre of one at a time, folding each end into the middle to create a single bow shape.  Then doing the same with the next ribbon, pilling them up as I went.  You can see this in the photos.  Finished off with a button.

Then it was just a case of threading the hearts, adding some extra ribbons and glueing all together at the back.

doorhanger

Sew-less Softie. Easy Craft Project.

Standard
Sew-less Softie.  Easy Craft Project.

This was one of those moments I love, when something just pops into your head and you think ‘yes, yes, yes I know what we’ll do!’ and it WORKS!   Originally it was supposed to be an octopus (8 legs) but Mr3 is calling it a spider and I think it looks a bit like a jellyfish, so what ever floats ya boat I suppose!

octopus


Mr8 chose green fabric, but I really wish we had used something a bit more fun.  The purple and white string livens it up a bit though.  Just run over or click on each photo for the steps.


Turn Recycled Cans into Cute Garden Ornament

Standard
Turn Recycled Cans into Cute Garden Ornament

This little piggy went to market…  And this little piggy just wants to play in the garden!  How cute is this? Made from recycled cans and a tin bucket, some pink paint, wire and a few screws!

OLYMPUS DIGITAL CAMERA

The assembly process was very similar to the Tin Can Men from a few days ago. You can see how they did it in the pictures below. I want one!

OLYMPUS DIGITAL CAMERA


This clever school holiday project is bought to you by All Tizzied Up.  If you are in Australia and in need of some bows, check out their page.

Tin Can Garden Men! School Holiday Project

Standard
Tin Can Garden Men! School Holiday Project

I must say I am quite jealous of all the projects the girls at All Tizzie Up are doing this holidays.  I have been so swamped with work and other obligations I just haven’t had the time or energy to get any of the things I wanted to done. But that will change!  In the meantime, I am very happy they are helping keep my blog active!  Here is some cute little tin can men they made using recycled cans, wire, paint, beads and some bells.


OLYMPUS DIGITAL CAMERA

Watch the slide show or click on the images for step by step instructions to make your own recycled can garden critters.


This slideshow requires JavaScript.

OLYMPUS DIGITAL CAMERA

Toddler Craft, Bottle Cap Beetles

Standard
Toddler Craft, Bottle Cap Beetles

Here’s a cute fine motor activity for the little ones using recycled objects from around the home. Made by All Tizzied Up over the school holidays.

OLYMPUS DIGITAL CAMERA


Hover over or click on the images below for more details.


OLYMPUS DIGITAL CAMERA

Rainbow Tutu Bag. With Step By Step Instructions.

Standard
Rainbow Tutu Bag.  With Step By Step Instructions.

How cute are these? And so simple to make if you can get your hands on a few cheap materials. All Tizzied Up and her girls put these together as little Christmas gift bags.

tutubag2


All you need is some tulle in your choice of colours, a cheap elastic headband and some small calico or reusable bags (available at most $2 shops) and some ribbon or other embellishments if you choose.  Oh, and a hot glue gun, of course!

Cut the  tulle into lengths long enough to reach the bottom of your bags when folded over.  For these bags, that was 30cm. You can buy tulle in 15cm wide rolls, this makes the job a lot easier than cutting the strips from a large piece, it is quite fiddly to work with.  Fold the now cut strip of tulle in half and push the folded part through the bottom row of the head band so it is poking through a little, then thread the 2 loose ends through the loop you have just created and pull tight.  Repeat this process right around the head band.  Stretch over the bag and hold in place with a few spots of hot glue.

For the embellishment on the above bag, several ribbons were secured with hot glue, then piled together and stuck down, finishing off with a fabric embellishment.  You could use anything though, buttons, curly ribbons, or just leave it as a plain skirt.  Here is another example that All Tizzied Up made for my DD as she is a huge Peppa fan.

IMG_4180


More detailed instructions available by running over the photos below.


DIY Christmas Bell Mobile

Standard
DIY Christmas Bell Mobile

If you like working with fabric like my friends at All Tizzied Up , here’s a simple Christmas craft decoration you can put together with the kids that will last for years to come.


fuffybells1


Once you have gathered the fabric you want to use, all you need is some styrofoam bells, ribbon, hot glue and sharp scissors and you’re ready to get crafty.  The smaller kids can get working on the covering the loop while an adult does the hot glue bits.  The rest of the steps are covered in the photos below.


Make Your Own Sensory Santa Slime.

Standard
Make Your Own Sensory Santa Slime.

Ok, so the school holidays have not quite started here, but this looked like too much fun and I had a fairly light schedule for the day, so we gave it a go.  The best part is, unlike normal play dough, it is not going to go bad when stored between uses.

sensoryslime

The recipe I followed required Elmers Glitter Glue, but after searching everywhere in a 20km radius I was still empty handed.  Apparently Elmers is available in Australia now, but from what I can tell it is only the white stuff, and I really wanted the clear version for this project.  So I just used non toxic craft glue, added my own glitter and was thankfully able to achieve the results I was after.  The recipe came from this delightful blog  

Santa Slime Recipe 

Combine the above ingredients in a bowl
 In a separate bowl combine
  • 3/4 teaspoons of borax
  • 1 & 1/3 cups very warm water
Once the ingredients of both bowls are mixed, combine them and mix, the slime will form almost instantly.

– See more at: http://www.growingajeweledrose.com/2013/12/santa-slime-recipe.html#sthash.MROKZyw1.dpuf

As I mixed up the ingredients I found it very hard to believe it needed all that water – but it really did, and then some!  Not sure if it was because I used so much glitter or because the make up of the glue I used was different than Elmers, but it turned out really firm, almost like play dough, and certainly didn’t ooze like I anticipated.  After I got over the initial disappointment, I figured I could either spend another $11 on glue or try to fix it – had nothing to lose, so I added more water to a section of it in a bowl (which did nothing while cool) and put it in the microwave for 2 minutes.  Yes, it worked, the slime took on more water and began to get runnier.  I continued to do this in sections, increasing the time in the microwave and the amount of water until I had the desired texture.  

The kids have been having heaps of fun with it, even the older 2.  We ended up with about 3 litres of slime after adding all the extra water, so plenty to share between the 4 of them.  If I make it again using the same glue, I will use twice as much water from the start, because adding some extra borax to thicken will be a lot easier than adding extra water was!

Peg Angels Quick Toddler Christmas Craft Activity

Standard
Peg Angels Quick Toddler Christmas Craft Activity

Check out these cute little Christmas Angels Miss4 and I put to gather today.  The best part? The whole kit, with everything except glue – $2 from Kmart.  Win.

angels


Ok ok, they have no arms, but who cares! We used hot glue to stick on the hair and faces, because hot glue rules the craft world (and I didn’t have time to PVA to dry).  The project is not something Miss4 could have done on her own, but it was quick, simple fun and the results are pretty cute.  She has been playing with them throughout the day and they have not fallen apart yet!

This slideshow requires JavaScript.

If you didn’t have access to a Kmart, the kit is made up of 4 old style wooden pegs, 4 paper doilies, wool, gold string and some pre cut wings.  All things that are easy to get your hands on from a craft of $2 shop.