Category Archives: Home Improvements

Upcycled pallet planters

Standard
Upcycled pallet planters

As part of the never-ending garden makeovers going on around here, I wanted 2 large barrels. I needed something off the ground so that my darling chooks and dogs would not dig them up, and the plants in them would have some chance of becoming established.  But then I saw how much barrels were and the idea went wayyyyyy down the list of priorities. I mean who is going to spend $200 to save some $3 petunias?

The blank canvas

The blank canvas.

I happened to be at Bunnings just a few days after Christmas, and their pallet recycling pile was massive, presumably from all the extra Christmas stock. I grabbed a long pallet for another project then inspiration struck! I called Mr. SAHL and he was on board.  What better reason to pull out all those power tools I buy him.

Unfortunately, heaps of the photos of the progress have gone missing, so what was going to be a step by step guide cannot be.  But hopefully, this blog can be inspiration enough anyway.  I was aiming for pots at least 70cm tall to deter the chooks. But you can make them any size you like really.


This slideshow requires JavaScript.


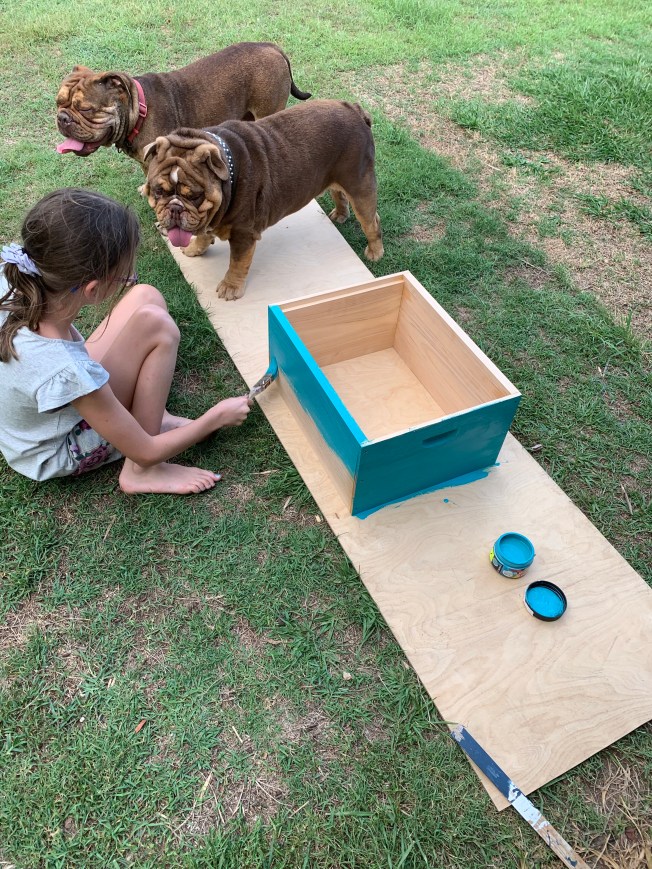
I was originally planning on painting them, but now I kind of like the rustic finish, even with the random chunks of blue. 🙂

UNADJUSTEDNONRAW_thumb_2928.jpgUNADJUSTEDNONRAW_thumb_2925.jpg

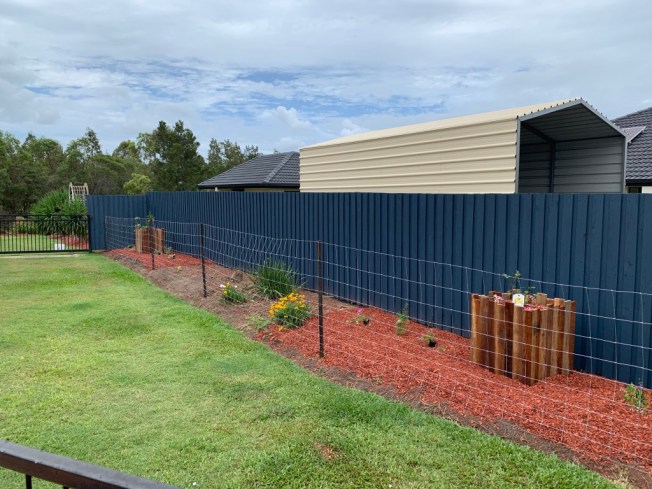
And we have progress.  The temporary fence is in place to keep the dogs and chooks out while the groundcover, lychee, and pomegranate trees get established. The middle section is where we will be building an aviary in a few months time. Stay tuned!

unadjustednonraw_thumb_297a

A family that bees together, stays together.

Standard
A family that bees together, stays together.

Or something like that. 🤷🏽‍♀️

I have been wanting a beehive pretty much forever. Now that we live on a bit more land with a lot more flowers and fruit trees, even more so. But when do you have a spare $400 or so to splash out on a box full of insects? So, alas, it has been sitting on the Wishlist for some time. In a strange turn of events, a swarm of bees made house at Mr SAHL’s work this spring. A kindly man came and removed the swarm and a friendship was established. To cut a long story short, said bees will ‘bee’ coming to live with us in just a few weeks!

But with bees comes responsibeelity! I swear I’ll stop with the bee puns never. In preparation for our new little garden helpers, today we started to build their home expansion (they’ll be coming in a hive).

To save a few dollars, we purchased everything in kit form. It was ridiculously easy to assemble as Miss 9 and Mr 8 demonstrated.

The kids loved assembling the frames and inserting the eyelets with a hammer. The hand-eye coordination and fine motor exercises won’t harm them either ;). Tensioning the wires was left to the adults, but all in all, it was very simple.

They all wanted to help with painting the box, even the doggies, which my OCD struggled with, but hopefully, I can fix that on the final coat.

Overall it was a productive afternoon. It was so nice to not even have to ask the kids to help, they were actually interested and motivated. Let’s hope this motivation keeps up once the actual bees arrive! wiring the framesframe with foundation

The Craft Cupboard Overhaul

Standard
The Craft Cupboard Overhaul

I’ll be honest, I rarely walk past a discount shop without picking up a little something for my craft stash.  The only problem with this, is finding somewhere to keep it all.  The side board I keep everything in was at breaking point, it had been for weeks actually. So it was time to dive in and sort everything out.  It was a painful 3 hour job, but worth it!


This slideshow requires JavaScript.


4 small bins worth of rubbish and a few hours later…


That all fits nicely now, but it did mean my supplies have to start taking over another room.

Craft cupboard.

Sewing kit, ribbon box, wool and twine box, tule, felt and glue stash.

Ohhh, looky, there is even some extra space!  What ever will I fill it with?  Mwahahaha!

Valentine Craft, Love Heart Door Hanger Part 2

Standard
Valentine Craft, Love Heart Door Hanger Part 2

This is another variation of our earlier Valentine Door Hanger , the main difference is rather than hanging the hearts from strings, we hot glued them to a flat ribbon.  The finer details can be found in the previous post or by hovering over the images below.

valentine3


Method and recipe for making the hearts can be found on the previous blog entry.

Turn Recycled Cans into Cute Garden Ornament

Standard
Turn Recycled Cans into Cute Garden Ornament

This little piggy went to market…  And this little piggy just wants to play in the garden!  How cute is this? Made from recycled cans and a tin bucket, some pink paint, wire and a few screws!

OLYMPUS DIGITAL CAMERA

The assembly process was very similar to the Tin Can Men from a few days ago. You can see how they did it in the pictures below. I want one!

OLYMPUS DIGITAL CAMERA


This clever school holiday project is bought to you by All Tizzied Up.  If you are in Australia and in need of some bows, check out their page.

Upcycled CDs. Sun Catcher.

Standard
Upcycled CDs. Sun Catcher.

We were having a clean out of old computer stuff and were about to throw away a pile of old discs, but I decided those shinny little things must be good for something else?  So after a bit of thinking, I came up with yet another sun catcher idea.  Anyone would think I like sparkly things?  It took me ages to work out what to cover, a sphere didn’t seem practical as the CD pieces are flat obviously, so after some uhmming and arrring, I decided wooden cubes were the best solution.  The lovely man at the local hardware was kind enough to give me some 3″ x 3″ off cuts for free.  The rest of the instructions are on the pictures.  I just used clear drying craft glue to attach the CD chips to the wood and the grout is standard bathroom tile grout mixed according to instructions, available from any hardware (we had some left over from the laundry renovation).

Recycled DVD / CD Sun catcher

Recycled DVD / CD Sun catcher

Sun Catcher.  CD / DVD

Sun Catcher. CD / DVD


CDsuncatcher

The New House – Part 1

Standard
The New House – Part 1

I had a long list of ‘must haves’ when it came to buying this house.  One of which was a decent laundry.  Out of the last 5 houses we had lived in, there was never a bench and I was over the moon actually, to even have a cupboard – lets not even talk about the ones that were part of the garage.  As with just about every other person in the world, I HATE doing the laundry.  So as much as I was looking forward to decorating the rest of the house, I decided to make the laundry as user friendly as possible first.

The blank canvas.

Notice the… nothingness. Oh, but there is space!!!!

We made some measurements to allow for a front loader washer and freezer to optimise bench space.  Took the measurements to Masters and designed the laundry.  At the last minute I decided against a bench the full length of the room and swapped that out for a broom cupboard.  So happy I did this, it fits all the mops, brooms, steam mop, fold away clothes horse, ironing board, all of which I hadn’t actually thought about before!  The existing dryer bracket was in a really bad spot, that meant you couldn’t really lean into the sink.  That, and the door on the washer and dryer opened in opposite directions but were also offset, made it really awkward to transfer loads from one to the other – so I moved it right over to beside the broom cupboard.  This also made fitting over head cupboards within the left over space easier.

At the last minute I decided to sacrifice some bench space for a broom cupboard – it was a good choice!

And finally the finished product.  You can really notice in the bottom photo the difference in tiles, unfortunately we looked everywhere and this was the closest match to the existing tiles.  In real life you can’t actually see the difference though – it was not worth potentially re-plastering the wall to replace the lot.   The colour is actually the same to the naked eye, its just the ripple is slightly different which catches the light differently at this camera angle.  We put the Dyson hand held into one of the over heads and ran the cord out to the plug, to keep things tidy.  A little basket for odds and ends (random pegs and coins found in pockets etc) a nice lush ever green by the window and some artificial succulents to brighten the room  – couldn’t be happier!

Yay!

The cat also has its litter box in the laundry, so it seemed like the logical place to put in a cat door.  There is also a small fold away line  again from Ikea.  Positioned right by the door to hang delicates and my beloved Enjo products that can’t go in the dryer.  I will probably hand a sheer curtain up at some point, but I am willing to wait until I find a good match in a bargain bin, rather than spending $150 on something I don’t really need.

This slideshow requires JavaScript.