
My puppies are classed as a Giant breed, so buying coats for them is never easy. XXL in doggy sizes still doesn’t fit around their necks. I bought Willow a custom made coat from the markets a few years ago, but it was $55, so I decided I needed to learn to make them myself! It really is quite easy, I can make one start to finish in about an hour now. The beauty of making them yourself is you don’t have to worry about them being adjustable to suit different sized dogs, which makes it a lot easier too.

Pampered pooches
Measure the dog from the centre of its chest to near its bum. Then measure from the collar at the top to to the top of their tail (along spine). Then measure over the shoulders, from how ever low you want it to sit on each side. If you are doing this for the first time you may want to try it out on some paper, then try it on the dog to see if you are happy with the shape. So, all you really need is some fabric. I use polar fleece, or husky fleece on the inside, and something a bit more durable on the outside. I have made some with a fur outer, but the 2 I made today are almost a cordroy fabric. I picked them up in the remnants bin for $5 each. I also buy the strap for the waist. You could make your own from the fabric, but I find the bag strapping stuff more durable, and clips easier to use. Many dog coats use velcro to fasten, but velcro gets full of dog hair and loses it effectiveness pretty quickly.
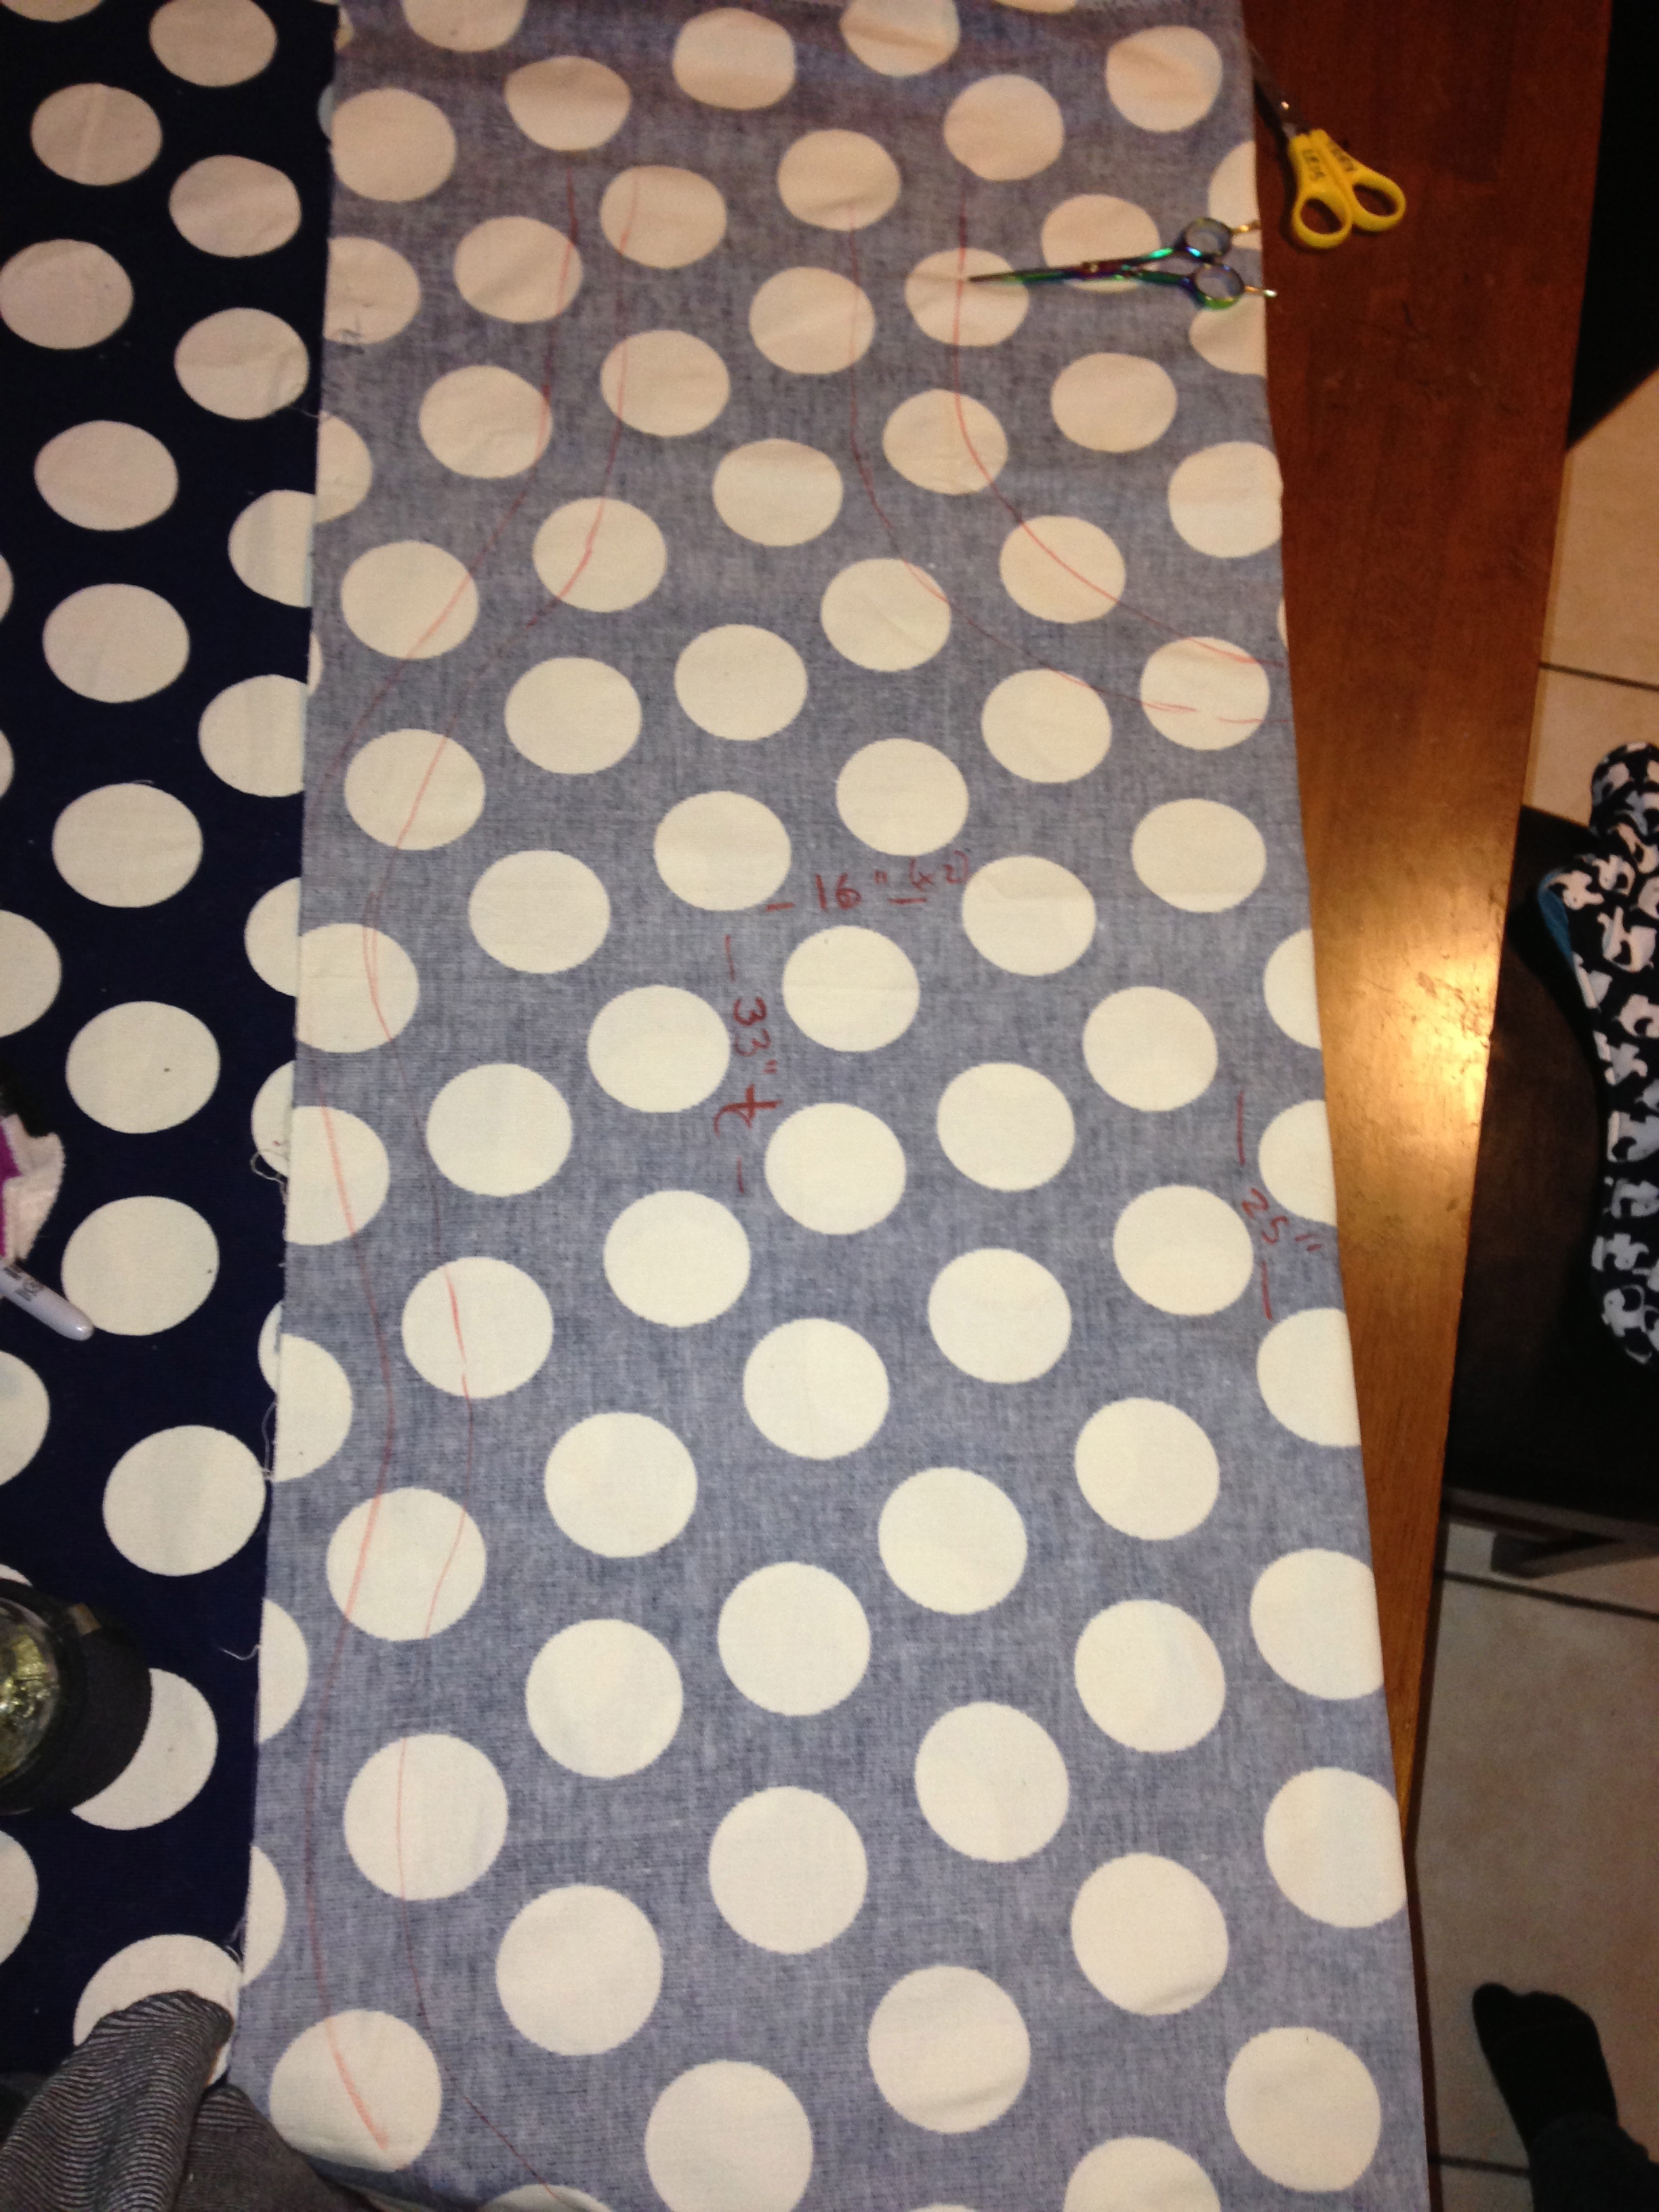
Fold the fabric in half so that each side will be the same. Notice I have 33″+ for the full length that will wrap around the neck area, I make this extra long at the start and it can just be cut down at the end when you finish it off and try it on the dog for the perfect fit. Pin together to avoid the fabric slipping then cut out. i have left at least 1″ for seems, because I am a very sloppy sewer, this allows plenty of room for error!


Use this cut out as the stencil for the next layer. Just trace around – easy peasy. Now, I add an extra square of the warm fabric in the middle of mine, but it’s really not necessary. So ignore that part if you are trying to follow these instructions to make your own. Its much easier just working with 2 pieces of fabric for a beginner. Once you have your two sections cut out, open them up and place together colour side in. Pin together to avoid movement and sew around the outside. I make the bottom section of mine a bit curved as you can see in the photos, this hides my dodgy sewing skills better, but if you can sew straight lines, make it straight! Leave one end of the neck section not sewn, so you can pull the coat in the right way. If you are making a coat for a little dog, I would actually leave a section in the middle of the side open to turn it through there, as you wont be able to fit your hand in the neck section. It really doesn’t matter where you leave it, but by doing it at the neck you can hide the messy bit when you fix the neck together to complete the coat. At this point you can cut off any excess seems. You don’t need to though if you’re lazy like me. Just make sure you cut away any excess around the neck part, or you wont be able to achieve nice sharp corners when you turn it in the right way. Speaking of which, its now time to do that….

Once pulled through, flatten out as best you can. I like to run another stitch right around the edge, about 1cm in. It just finishes it off nicer and give it a better more sturdy shape. You can skip this step though if you like. Then put it over doggy and get the neck fitting. Mark with a pen. Then simply sew it together. I cross them over and sew a square shape, then an X through the middle. You could just do a centre seam though if you like. If your dogs weight fluctuates, you may like to just add velcro here so its adjustable.

Lastly, add the waist strap. The strapping was $1.79 a meter, and I cut the clips off an old back pack of the kids (they were only decorative anyway?). Attach to the middle on each side. I just used the machine and went back and forth about 10 times. If you were making a small dog coat and had left the opening to turn it through at the side, you could neatly tuck the strap in there. You don’t see the inside part when its on, so it doesn’t matter how it looks anyway. Its best to allow the strap to wrap right around the dog, rather than just under the belly, it secures the coat much better. And thats really it. I have probably made this sound so much more complicated than it is, it really is a very straight forward sewing project.


