
This project was inspired by another bloggers post, which I can’t find again on Pinterest, so will have to edit it back in later when I can find it. Anyway, I ended up doing something completely different to hers, because I couldn’t get my hands on the right kind of cups. The original mobile was created with plastic (recycling number 6) disposable drinking cups. I hunted high and low however, the only ones of them here were solid colours, so I had to settle for these shot glasses. The shot glasses are a lot thicker though, so the entire method required adjusting. As you can see in the gallery images, melting these at a low heat basically make little plastic globs that would only be good for playing jacks with. Eventually I worked out that by turning the heat up enough, I could get them to melt flat. However, they did emit a nasty smell at this temp, so I took the project out to the BBQ.

Adding the next colour
After melting the first cups, I added another cup, so there was enough plastic to cover the base of each muffin hole. I was not too worried about thickness, some ended up with 3 cups, I broke a few cups up to splash some other colour around. The BBQ was set to 220C with the lid down. After cooling, this is what you get;
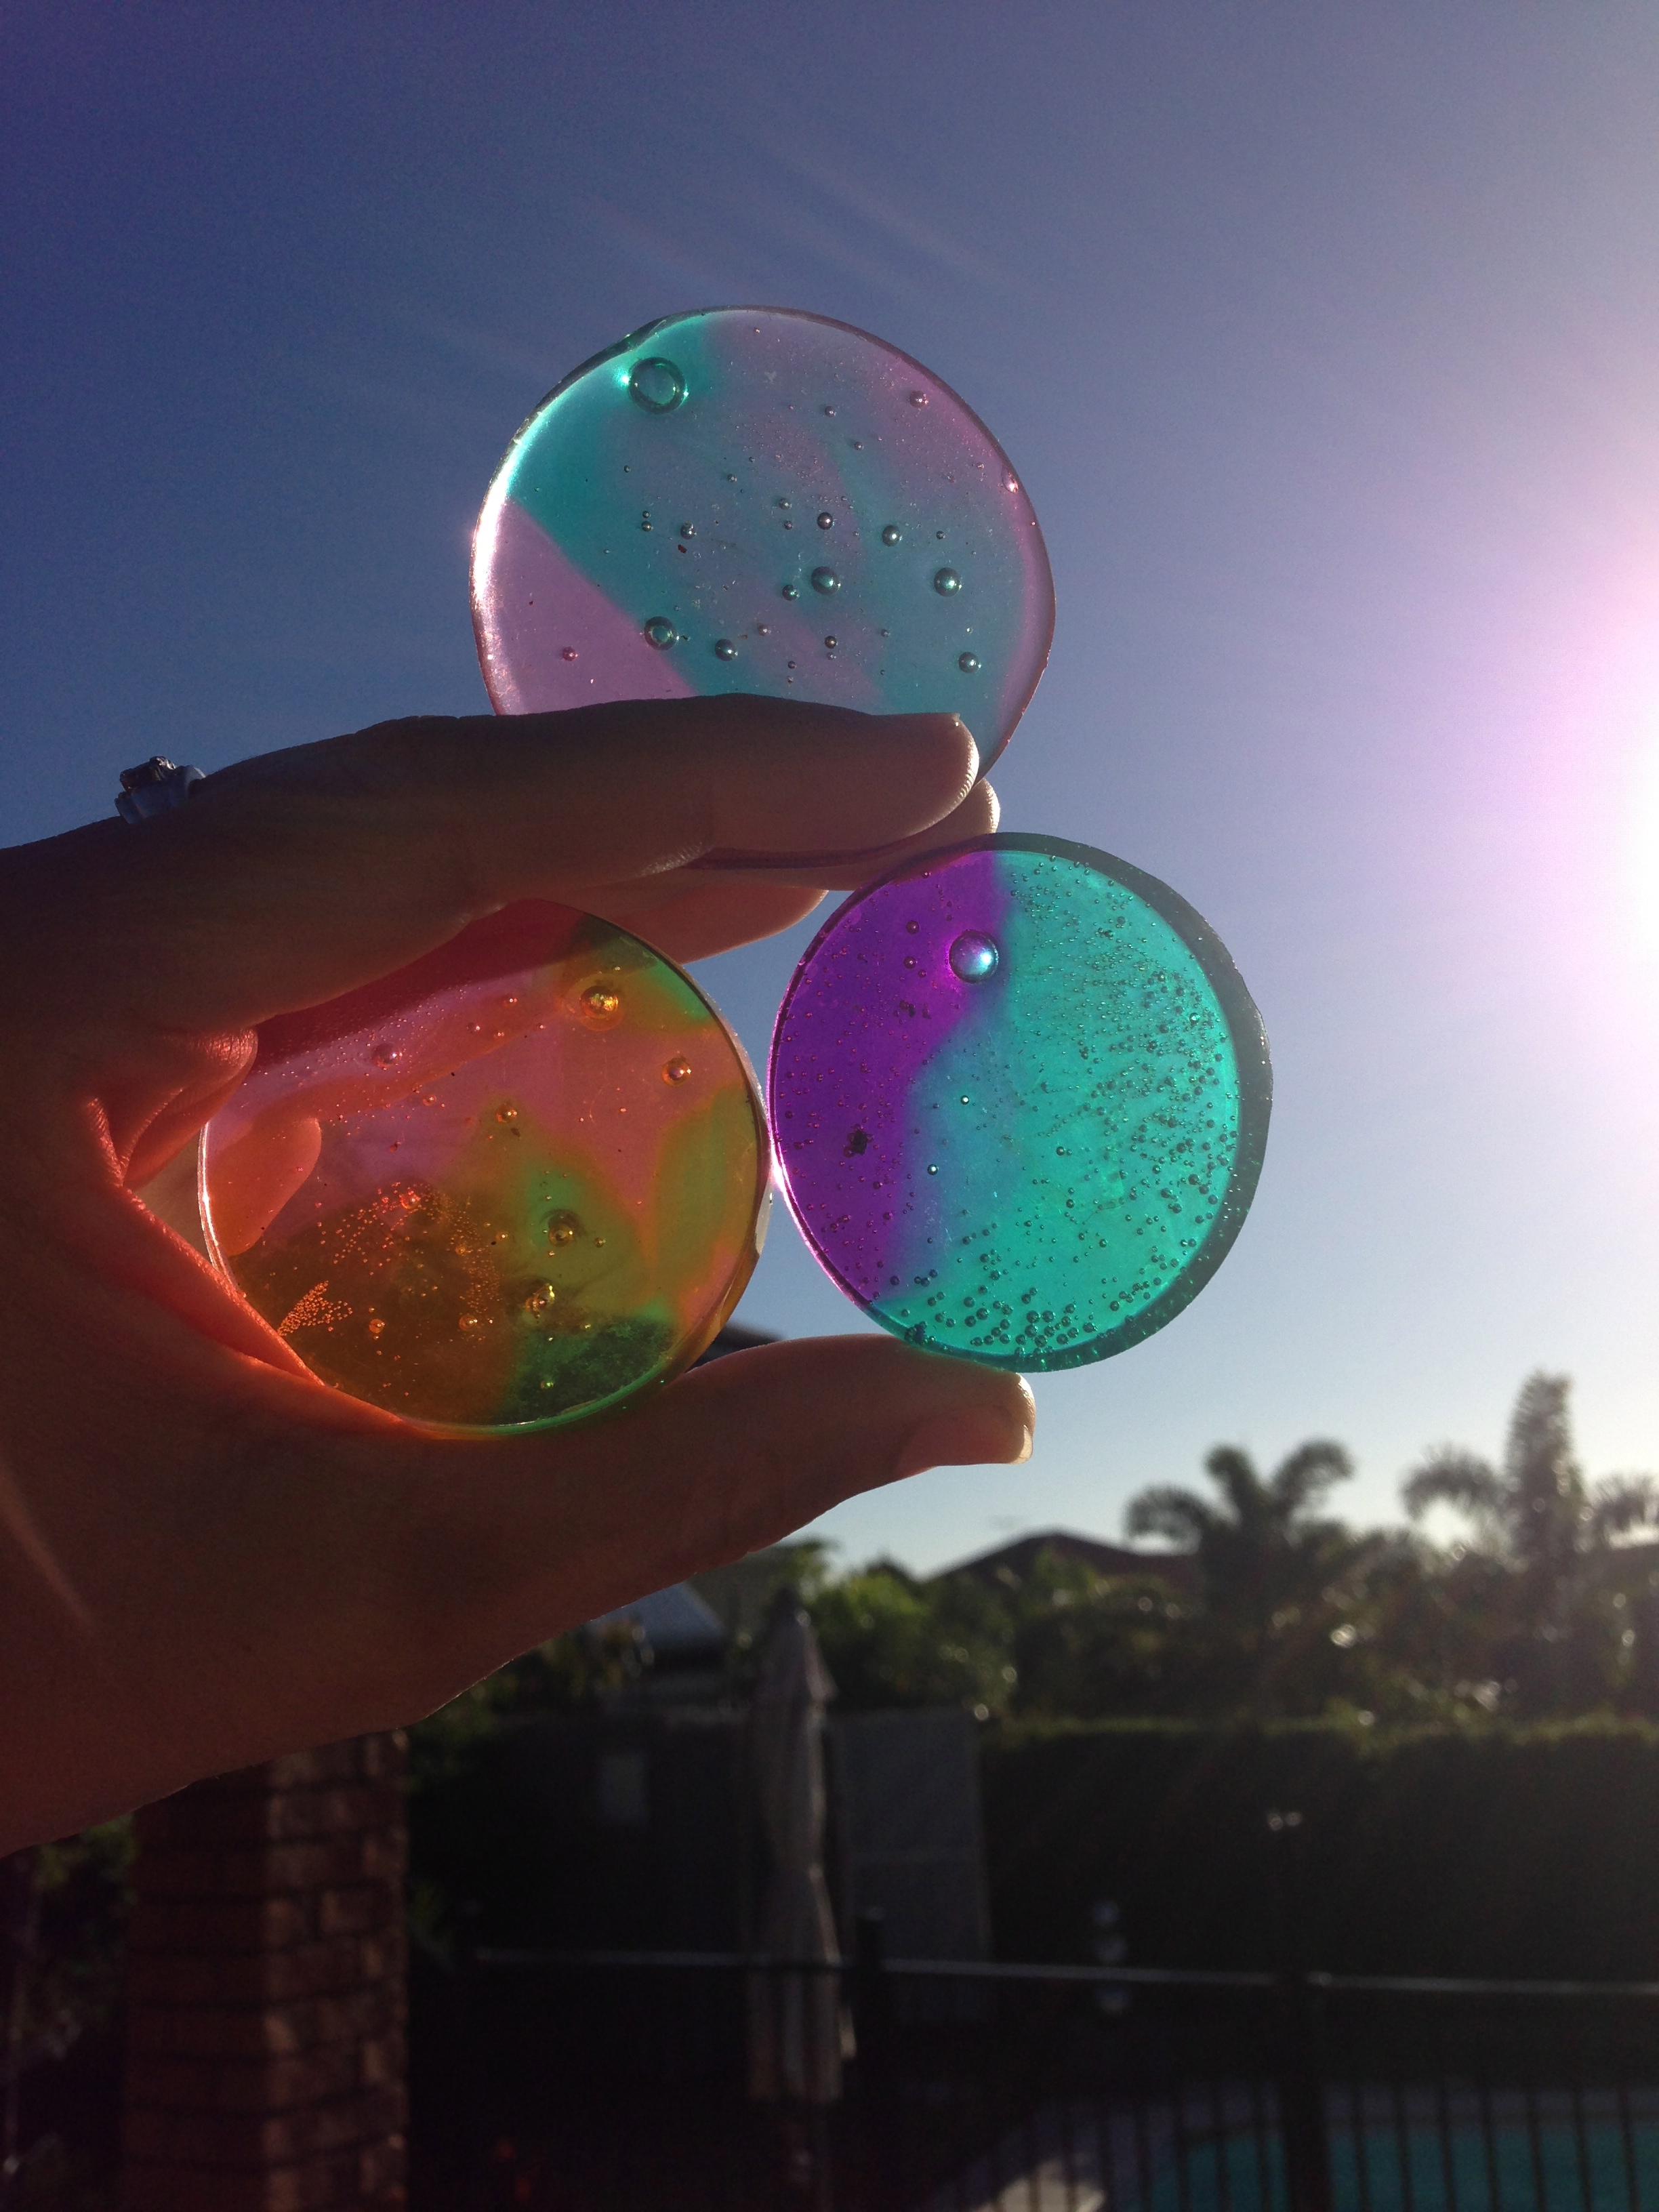
The finished disks
They actually set really hard and when clicked together sound like glass rather than plastic. Makes them perfect for a wind chime. Just like with my previous sun catcher, I drilled holes in the sides of each piece using a normal drill bit. None of them broke this time, which was an extra win. Then we threaded some fishing line through, held each end together and threaded random shiny and transparent beads along the 2 lines. Admittedly I do have a ridiculously huge stash of beads and stones accumulated from over the years, but you can pick up cheap beads at $2 shops that will still make the project inexpensive if you were starting from scratch. The first line was 11cm, then I continued along making each one 1cm longer, there is 17 in total. My darling partner tied them on to the pre made metal loop (from spotlight – and much to his disappointment, he is not a crafty person). Once they were all tied on, I just slid them around until they were spaced evenly. And done!

Close up
** Please note, breathing in the fumes from melting plastic is probably not a very good idea. So if you do try this at home, try to use the BBQ or make sure the room is well ventilated, and preferably don’t be near the oven while its all happening. It not like burning tyres or anything, but it sure doesn’t smell like something you should be breathing in!


You can also melt beads in the muffen ten instead of cups.
Yep, I have made a bead one earlier in the year (you can see it if you go back a few months). I used cookie cutters for it though to make different shapes 🙂
I bought a deer head cookie cutter and used it to make a windchime using camo color pony beads to melt and along the fishline. Also added a couple of old craft cow bells and hung everything from a deer antler. Came out great!
What kind of beads? Where do you get them?
They are called pony beads and most craft shops or variety stores sell them.
Zowiewow beautiful gonna make one I hope
Wow! The wind chime looks great!
Love this! Great idea, and i am going to give this a shot.!
I love the idea! I want to try it – did you use any sort of non-stick spray on the muffin tin, or did the cooled plastic just pop out?
They are silicone trays, so have their own non stick properties – they just popped right out when cool. Try to use ones with a smooth surface though, if it has any texture, that will transfer to the finish and won’t be as shinny. Will still work though. 🙂
How long do you put them in the oven for please?
Pingback: crea… | ~ * Pagan Ouderschap / Pagan Parenting * ~
where can I find the metal loops?
Big craft stores should carry them. I am not sure where you are, but here Spotlight, or Lincraft have them. But you could use anything really, a stick, or make your own loop with wire.
yea, living in a small town is a tad difficult! This has been the hardest part of the project of this kind for me. I have done alternative things, as you have suggested, and they have turned out fine. Hope to one day run across these around here! What a great project btw!
I think a metal hanger bent circular with colorful print ribbon wrapped around & glued will look cool to! Or a wood embroidery hoop are super cheap (<$4) & come in all sizes. Also those plant hanger bowl things you can get for $1 at dollar tree! Plus, they have spokes that may help attach beading wire! I'll try to find a pic bc my explanation is pretty lame lol.
Yeah that is a good idea! I know what you mean 🙂
Here’s a Link to a pic of the wIre plant basket bowl with spokes. Geez. What an explanation. 😳 http://www.google.com/imgres?imgurl=https://trash2treasure.files.wordpress.com/2010/05/wire-baskets.jpg&imgrefurl=https://trash2treasure.wordpress.com/category/why-didnt-i-think-of-this/&h=420&w=700&tbnid=6RDwdEUTkqDP1M:&docid=x2k2UjeEBrDBDM&hl=en&ei=Rfm_VefKLYTQ-QHR3LPQDA&tbm=isch&client=safari&ved=0CEMQMygbMBtqFQoTCKeB4sqIjscCFQRoPgodUe4Myg
Maybe you can use an embroidery hoop instead of a metal hoop if you can not fine one.
Thanks for visiting and following my blog today. Your projects are all so inspiring and beautiful. I look forward to sharing. Blessings Always, Mtetar
I like that very much, will have to try, I take my toaster oven out doors and it works great, the smell is so bad if you don’t. I never tried the cups I used old beads. But this would be a lot cheaper. Thanks for sharing.
You are welcome Donna always my pleasure. Be Blessed, Mtetar
Pingback: 7 Charming DIY Wind Chimes That Will Embellish Your Backyard
This looks like fun! I can’t wait to try it with my daughter. For Christi who is looking for a metal hoop, I am going to use the wire hoop from an old lampshade. I am planning to just take the lampshade apart and use the top circle hoop. I might have to cut some bits of wire off but I think it will work. If someone else wants to try this and doesn’t have a lampshade at home, inexpensive ones can be found at garage sales or Goodwills.
Oh excellent idea. A cheap lamp from a garage sale would probably be cheaper than the loops form spotlight anyway!
What weight fishing line did you use? Love these.
The roll I have is 7lb. But you probably don’t need it that strong even. 🙂
What did you use for the metal ring?
this is really pretty and I’d like to make one – LOVE the little discs – but can’t figure out what the plastics are that you melted – where would you get those little cups and those other little figures you melted? I’m old – and these must be some new modern things – thanks!
Just any $1 store or even the party supplies section at the supermarket should have them. They are usually in a pack of 40 for a couple of dollars. They are disposable shot glasses.
Pingback: The Contest Between the Sun and the Wind
hiya 🙂 came across your page as i am DIY window shopping atm…..i love, LOVE this idea, would look sooo very pretty in my garden….i just wanted to ask, is there anything else you could use besides the plastic shot or party cups?!?!? i’m just thinking of some cool colours 🙂
love your page & i look forward to hearing back from you….Jo x
Plastic beads work. If you go to sun catchers on my side menu you’ll see another one we did with beads. I think it’s all about the melting temp and plastic number. Might have to do some experimenting 🙂
I am wondering if the regular sizes of #6 plastic cups would work??? Longer time in oven I would imagine but I think I will break one up and give it a try. Has anyone out there tried using thicker #6 plastic cups? If so please share your experiences. Thanks.
Will have to try this very pretty thanks for all the information.That is very important.Some people dont explain it
hello, as with all your followers, i love those plastic disks in the wind chime. can you give me a ball park figure of how long does it take to melt the plastic items in the muffin tins? i don’t want to over melt them to burning point. thank you, Nancy
ohhh, you know it was so long ago now I really don’t recall. Maybe 20 minutes? It was not too long as I didn’t venture far from the BBQ. Also keep in mind my heat it celsius not fahrenheit. Had someone confused by this on another tutorial!
thank you for your fast reply.Now i know how long to wait. i will be using fahrenheit. 220 celsius is = to 428 fahrenheit.My toaster oven goes to 400 F, so should work fine (I hope). thank you again for your help.
I have just started making some of these and I find that if I have the toaster oven on 220C, 20 minutes isn’t quite enough to get that glassy look that I think makes these look so lovely. After 20 minutes, I would check them every 5 minutes until they were all melted. I did find that if I left them in too long, they began to smoke so take care to keep an eye on them after 20 minutes. The smell is horrid!! So glad I can do these outdoors!!
I just can’t figure out how your discs are so clear and the colors so melted together. This is my first attempt so any advice would be really appreciated. I am using a table top oven at 220C – should I try a higher temperature?? I have left them in for up to 35 minutes and still have not got that lovely look that yours have. Thank you,
I just love these – they actually look like glass! I live in Europe and need to find out if our recycle numbers are the same as the USA. I have #5 plastic glasses now but …. not sure if they can be used. Any advise?? Thanks so much for your well written tutotial!
I am really not sure. I am actually in Australia, not sure if the numbers are universal? Maybe just try one and see how it goes! 🙂
Did you end up using the ‘fail’blobs? Just curious if they could be remelted or not. Can’t wait to make some of these this summer. Will definately use my table top oven – outside!
I am wondering if the regular sizes of #6 plastic cups would work??? Longer time in oven I would imagine but I think I will break one up and give it a try. Has anyone out there tried using thicker #6 plastic cups? If so please share your experiences. Thanks.
Can I use metal muffin tins? I was planning to make this for Mother’s Day.
I am not really sure. I have done a similar project with metal cookie cutters and it was a bit trickier to get out. You might just have to test with one first.
Would you be able to use those silicone baking ‘dishes’ to melt the cup/beads?
Yes, silicone works well. 🙂
How do you get the disk out of the pan? this is the 3rd time trying and im not having any luck. (First time evaporated in flames lol)
Are you using silicone or metal trays? I used silicone so they just popped straight out.
Isn’t silicone something that melts? What do mean silicon trays, isn’t it silicon that you would put in them to melt? I’ve only seen metal trays and I’m right next door to you in NZ. I recon cutting up the flat parts of the cups would help them to melt at a less temperature.
There are lots of silicone bake ware products. You can buy them at Kmart, Woolworths, Target etc, or even Tupperware sell them. I have mainly Tupperware ones myself.
I could not find a temp for the oven or how long time wise to melt them for. Please help.
Second paragraph, BBQ was set at 220C, Just keep checking on them every few minutes to see when they are fully melted, then allow to cool.
I want to try this! Is there any leftover smell in the BBQ? My husband would kill me :0)
No, not at all.
Pingback: 6 Interesting DIY Wind Chimes Ideas To Try This Summer: Part 1 -
Pingback: Hacker4Home
I was inspired to try out an idea that I got while reading the comments. When I realized that the plastic would stick to metal that was not non-sticking I thought to break up plastic and put the pieces inside of a metal rim from a can. I then placed that on a piece of baking paper and it turned out so cool – it is as if the melted plastic has a frame around it. I can’t wait to do more so I can make a mobile! I plan on painting the rims with metallic paint so they are brighter.
Pingback: Plastic DIY Projects | @passportcouture
I just started making these with melted beads. I use a toaster oven on my porch at 400 degrees for 20 mins in muffin pans different sizes. Doing outside takes care of the smell. I sell these with my jewelry that I make. Makes a very nice yard sell. I am going to try the plastic cups. I think those little red solo cups would work great. Going to try them this weekend.
Lets us know how you go. Only some types of plastic work. 🙂
I do this too! Easy to find beads and an extra toaster oven for my porch!
Pingback: Sun Catcher Wind Chime Project | Do It Daily
Does the color eventually fade out from being out in the sun? Also, if I used my toaster oven outside, can it be used for food again or is it contaminated from the fumes? Thanks for your time in responding. Holiday Blessings, Sue
Mine have been outside for about 3 years now, getting half a day sun and have not lost any colour. The toaster should be fine if you don’t spill any inside it. 🙂
I started melting beads with my granddaughters a couple of summers ago. The bbq was just too hot to control. I found a used toaster oven for free and it works fine. Out on the back porch and the smell is of no bother and it’s strictly for crafts.
How to color?
How do I get color on the cups if their not already colored?
I am not sure if you could. You’d need to find some paint that would not burn at high temps, which would probably cost more than just buying different cups.
Pingback: Wind Chime Crafts for Kids | Nifymag.com
I can’t get my #6 full sized cups to melt flat in the muffin tin. Put them at 400 for 20 minutes.
What am I doing wrong?
Is that 400f or celsius? If it’s Fahrenheit you might need to go hotter.
Cut up the plastic in smaller pieces and make sure the tin is covered.
Pingback: Sculpture by the Sea: Life’s a breeze – Shopping Online: How and What to get from the U.S.
Hi, I am more of a DI Don’t than DIY (LOL) and even I think that I could make this…. My only boggle is that I can’t see how you have attached the fishing wire at the top, on the circle??? Please help me out of my misery….. Thanks so very much!
Just tied them in a knot. 🙂
The same effect can be made by melting flourescent beads in a toaster oven in cookie molds. I made a lot of them as gifts at Christmas. Beads available at Dollar store and Walmart.
These are beautiful! I love the photos of the process and the child participating in creating it. I want one of maybe a LOT of these to use and to gift. Thank you so much for sharing this.
Pingback: DIY Sun catcher/Wind chime. - AllDIYIdeas.comDIY Ideas
Pingback: DIY Sun catcher/Wind chime. - AllDIYIdeas.comDIY Ideas
I am so interested in this project but I confess to feeling like I walked in to an existing conversation! What should I be looking up for tin size, if tins are prepped and temperatures… I would love a basis for this project! Also where do you get your shot glasses? Dollar store? I have never seen coloured ones…. of reread and saw BBQ temp…sorry!
I just used small muffin tins, but the size is really up to you. And yes just dollar store (not that particular franchise but any cheap shop). Just make sure they have the right recycle code on the bottom or they will not melt they’ll just burn.
Pingback: 40 Relaxing Wind Chime Ideas To Fill Your Outdoors With Beautiful Sounds - DIY & Crafts
Pingback: 40 Relaxing Wind Chime Ideas To Fill Your Outdoors With Beautiful Sounds - Diy
Pingback: 15+ DIY Homemade Wind Chimes Crafts for Kids - Kids Art & Craft
You said that they look and sound like glass. How breakable are they? Where I live we can get some strong winds and I’m wondering how easy they could break.
Hi Stacy, mine has fallen to the ground a couple of times, landing on concrete and none have broken. So I think that’s a pretty good indicator or strength. 🙂
Pingback: 20 beautiful wind chimes that kids can make this summer – The Backyard
Pingback: 20 Unique DIY Wind Chimes - Cool DIYs
Pingback: Outstanding DIY Wind Chimes Ideas To Make Your Home Marvelous • Diy Homedecorz
Pingback: 17 Amazing DIY Wind Chime Ideas for Relaxing Outdoor Atmosphere - Style Motivation
Pingback: 17 Amazing DIY Wind Chime Ideas for Relaxing Outdoor Atmosphere – chuckiesblog
How long did you heat them? I am not getting the same results. I am using the exact plastic cups, and I am getting circles with holes in the middle, or blobs of plastic not melting together. Help please want to use for Christmas
Hi Tracy. It sounds like you need to turn the heat up. Try increasing the heat at 10-degree increments and see how you go. It shouldn’t take very long once you reach the correct melting point. 🙂
Pingback: 10 Whimsical Wind Chime Crafts for Kids of All Ages
I am always amazed at the imaginations of how one can give a craft their own spin on a craft. The bbq is a great way of keeping the odour out of the kitchen. Love the windchime.